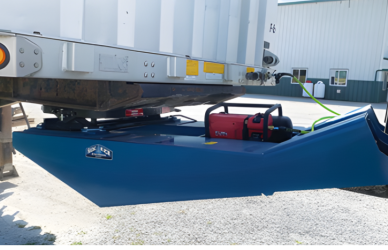
Leaf springs play a crucial role in supporting heavy loads and maintaining the stability of a vehicle’s suspension system. Over time, these components can wear out or become damaged, requiring replacement to ensure safe and smooth operation. If you’re facing the task of replacing leaf springs, this quick overview will walk you through the process while providing insights on recognizing when it’s time for a replacement.
Signs It’s Time to Replace Leaf Springs
Leaf springs, like any other vehicle component, have a finite lifespan. Here are some key indicators that your leaf springs may need replacement:
- Sagging Suspension – A sagging rear suspension is one of the most noticeable signs of worn-out leaf springs. If your vehicle appears lower in the rear than usual, it’s likely time to replace the leaf springs.
- Uneven Ride Height – A vehicle with uneven ride height, where one side of the rear end is lower than the other, indicates that the leaf springs on that side may be worn or damaged.
- Excessive Bouncing – If your vehicle bounces excessively after hitting bumps or dips in the road, it could be due to worn-out leaf springs that are no longer providing proper support.
- Harsh Ride – A sudden increase in road vibrations and a harsher ride quality could be a sign that the leaf springs are not absorbing shocks effectively.
- Noise from the Rear – Clunking, squeaking, or other unusual noises from the rear of the vehicle, especially during acceleration or over bumps, may indicate worn-out or damaged leaf springs.
- Visible Damage – Inspect the leaf springs for visible signs of damage, such as cracks, corrosion, or broken leaves. Any of these issues can compromise the structural integrity of the springs.
Leaf Spring Replacement
Now that you’re familiar with the signs of worn-out leaf springs, let’s dive into the process of replacing them.
Step 1: Gather the Necessary Tools and Materials
Before you begin, make sure you have all the tools and materials required for a successful leaf spring replacement. You’ll need a jack, jack stands, wrenches, sockets, a pry bar, new leaf springs, bushings, and bolts. Safety equipment such as gloves and protective eyewear are also essential.
Step 2: Lift the Vehicle
Park the vehicle on a level surface and engage the parking brake. Use a jack to lift the vehicle’s rear, supporting it securely with jack stands. This will provide the necessary clearance to access and replace the leaf springs.
Step 3: Remove the Old Leaf Springs
Locate the leaf springs and identify the mounting points. Carefully remove the old leaf springs by loosening and removing the bolts that secure them to the axle and chassis. A wrench and socket set will be handy for this step. If the leaf springs are stuck, a pry bar can help gently separate them.
Step 4: Replace Bushings and Bolts
Inspect the old bushings and bolts for wear and damage. Replacing these components with new ones is recommended to ensure optimal performance and longevity. Attach the new bushings to the new leaf springs and secure them in place with the provided bolts.
Step 5: Install the New Leaf Springs
With the new bushings and bolts in place, position the new leaf springs on the axle and chassis mounting points. Align the holes on the leaf springs with the holes on the mounting points to prepare for bolt installation.
Step 6: Tighten Bolts
Begin tightening the bolts, starting with hand-tightening to ensure proper alignment. Gradually use a wrench and socket to tighten the bolts to the manufacturer’s specifications. The tightening sequence may vary depending on your vehicle model, so consult the manufacturer’s guidelines.
Step 7: Lower the Vehicle
Once the new leaf springs are securely in place, carefully remove the jack stands and lower the vehicle using the jack. Gently bounce the vehicle to settle the suspension.
Step 8: Test Drive and Inspection
Take your vehicle for a short test drive to ensure the new leaf springs function as expected. Listen for any unusual noises and pay attention to the vehicle’s handling. After the test drive, inspect the bolts and bushings for any signs of looseness or movement.
Step 9: Alignment Check
A leaf spring replacement might affect the alignment of your vehicle. It’s recommended to have the alignment checked and adjusted by a professional if necessary. Proper alignment ensures even tire wear and optimal handling.
Step 10: Maintenance and Care
To extend the lifespan of your new leaf springs, perform regular maintenance by checking for signs of wear, lubricating moving parts, and addressing any issues promptly.
By recognizing the signs of worn-out leaf springs and following this comprehensive guide, you can confidently replace your vehicle’s leaf springs and enjoy improved suspension performance. Remember that safety is paramount throughout the process, so take your time and exercise caution to achieve the best results.


